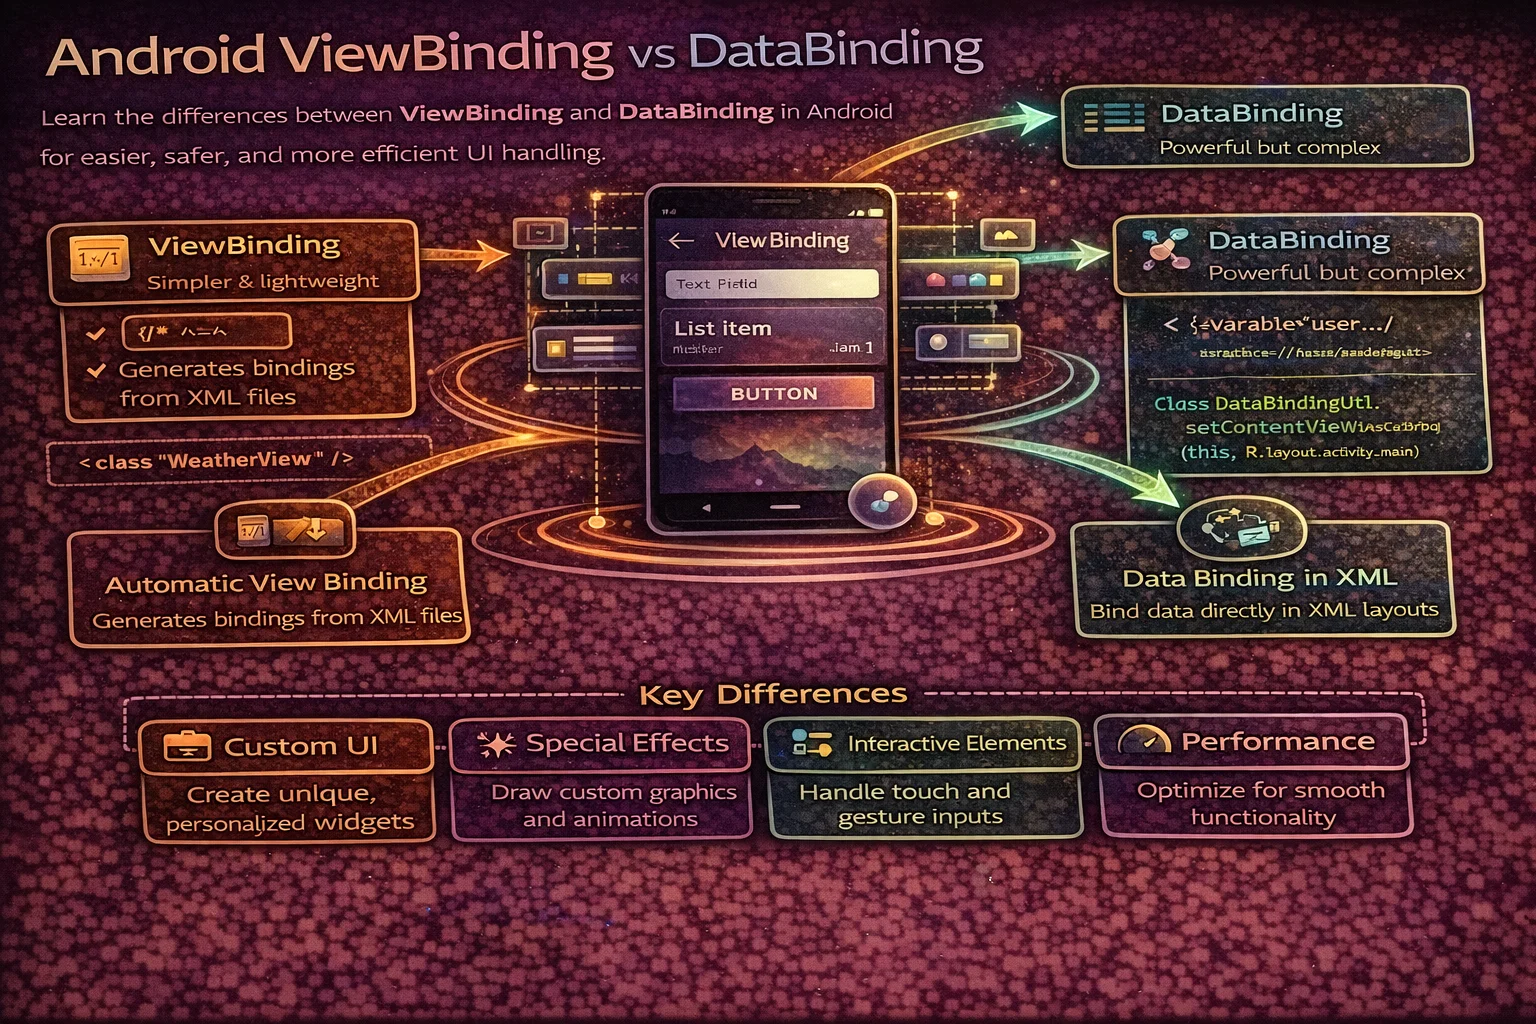
If you’ve ever written findViewById and gotten a crash because the ID was wrong, or cast a View to the wrong type — you know the pain. ViewBinding and DataBinding both solve this problem, but in very different ways with very different trade-offs. ViewBinding is lightweight and gives you type-safe View access. DataBinding is powerful and lets you bind data directly in XML. Most modern Android projects use ViewBinding — and this guide explains exactly why, when DataBinding still makes sense, and how to set up both correctly.
The Problem Both Solve
// The old way — findViewById
// Three problems: null crashes, wrong type casts, verbose boilerplate

// ❌ Problem 1: wrong ID — runtime crash
val title = findViewById<TextView>(R.id.titleText)
// What if titleText doesn't exist in THIS layout? → null → crash

// ❌ Problem 2: wrong type — runtime crash
val button = findViewById<Button>(R.id.titleText)
// titleText is a TextView, not a Button → ClassCastException

// ❌ Problem 3: verbose boilerplate
val title = findViewById<TextView>(R.id.titleText)
val subtitle = findViewById<TextView>(R.id.subtitleText)
val image = findViewById<ImageView>(R.id.articleImage)
val button = findViewById<Button>(R.id.submitButton)
val progress = findViewById<ProgressBar>(R.id.loadingSpinner)
// Five lines just to get references — and this is a simple screen

// Both ViewBinding and DataBinding eliminate all three problems
ViewBinding
ViewBinding generates a binding class for each XML layout file. The class contains direct references to every View that has an android:id — type-safe and null-safe at compile time.
Setup
// build.gradle.kts
android {
    buildFeatures {
        viewBinding = true
    }
}

// That's it — no annotation processors, no code generation plugins
// Rebuild the project → binding classes are generated automatically

// For activity_main.xml → ActivityMainBinding is generated
// For fragment_article.xml → FragmentArticleBinding is generated
// For item_article.xml → ItemArticleBinding is generated

// Naming convention: XML filename in PascalCase + "Binding"
Usage in Activity
class MainActivity : AppCompatActivity() {

    private lateinit var binding: ActivityMainBinding

    override fun onCreate(savedInstanceState: Bundle?) {
        super.onCreate(savedInstanceState)

        // Inflate the binding
        binding = ActivityMainBinding.inflate(layoutInflater)
        setContentView(binding.root)

        // Access Views — type-safe, no findViewById
        binding.titleText.text = "Hello, ViewBinding!"
        binding.submitButton.setOnClickListener { submit() }
        binding.loadingSpinner.isVisible = false

        // binding.titleText is guaranteed to be a TextView
        // binding.submitButton is guaranteed to be a Button
        // No wrong types, no null crashes
    }
}
Usage in Fragment
class ArticleFragment : Fragment(R.layout.fragment_article) {

    // Nullable backing field — null when View doesn't exist
    private var _binding: FragmentArticleBinding? = null
    private val binding get() = _binding!!

    override fun onViewCreated(view: View, savedInstanceState: Bundle?) {
        super.onViewCreated(view, savedInstanceState)

        _binding = FragmentArticleBinding.bind(view)

        binding.titleText.text = "Article Title"
        binding.recyclerView.adapter = adapter
        binding.retryButton.setOnClickListener { viewModel.retry() }
    }

    override fun onDestroyView() {
        super.onDestroyView()
        _binding = null   // CRITICAL — prevents memory leak
    }
}

// Why the nullable pattern?
// Fragment can outlive its View (back stack)
// If _binding holds View references after onDestroyView → memory leak
// Setting to null allows Views to be garbage collected
Usage in RecyclerView ViewHolder
class ArticleViewHolder(
    private val binding: ItemArticleBinding
) : RecyclerView.ViewHolder(binding.root) {

    fun bind(article: Article) {
        binding.titleText.text = article.title
        binding.subtitleText.text = article.author
        binding.articleImage.load(article.imageUrl)
    }
}

// In Adapter
override fun onCreateViewHolder(parent: ViewGroup, viewType: Int): ArticleViewHolder {
    val binding = ItemArticleBinding.inflate(
        LayoutInflater.from(parent.context), parent, false
    )
    return ArticleViewHolder(binding)
}
Usage in Custom Views
class LabeledInput @JvmOverloads constructor(
    context: Context,
    attrs: AttributeSet? = null,
    defStyleAttr: Int = 0
) : LinearLayout(context, attrs, defStyleAttr) {

    private val binding: ViewLabeledInputBinding

    init {
        orientation = VERTICAL
        binding = ViewLabeledInputBinding.inflate(
            LayoutInflater.from(context), this, true   // attachToRoot = true
        )
        binding.label.text = "Name"
        binding.input.hint = "Enter your name"
    }
}
Excluding layouts from ViewBinding
<!-- If you don't want a binding class generated for a specific layout,
     add tools:viewBindingIgnore="true" to the root element -->

<LinearLayout
    xmlns:android="http://schemas.android.com/apk/res/android"
    xmlns:tools="http://schemas.android.com/tools"
    tools:viewBindingIgnore="true"
    ... >
</LinearLayout>

<!-- Useful for: include layouts, test layouts, or layouts used only in another binding -->
DataBinding
DataBinding does everything ViewBinding does, plus lets you bind data directly in XML using expressions. Your XML becomes aware of your data models and can display values, handle clicks, and react to changes without code.
Setup
// build.gradle.kts
android {
    buildFeatures {
        dataBinding = true
    }
}

// DataBinding requires:
// - Wrapping your XML in a <layout> tag
// - Declaring variables in a <data> block
// - Using expressions in XML attributes with @{}

// DataBinding uses annotation processing → slower builds than ViewBinding
XML layout with DataBinding
<!-- res/layout/activity_profile.xml -->
<layout xmlns:android="http://schemas.android.com/apk/res/android"
    xmlns:app="http://schemas.android.com/apk/res-auto"
    xmlns:tools="http://schemas.android.com/tools">

    <!-- Data block — declare variables available in this layout -->
    <data>
        <variable name="user" type="com.example.model.User" />
        <variable name="viewModel" type="com.example.ProfileViewModel" />

        <import type="android.view.View" />
    </data>

    <!-- Layout content — use @{} expressions -->
    <ConstraintLayout
        android:layout_width="match_parent"
        android:layout_height="match_parent">

        <!-- Bind text directly from data model -->
        <TextView
            android:id="@+id/nameText"
            android:layout_width="wrap_content"
            android:layout_height="wrap_content"
            android:text="@{user.name}"
            tools:text="Alice Johnson" />

        <!-- Conditional visibility -->
        <TextView
            android:id="@+id/premiumBadge"
            android:layout_width="wrap_content"
            android:layout_height="wrap_content"
            android:text="Premium"
            android:visibility="@{user.isPremium ? View.VISIBLE : View.GONE}" />

        <!-- String formatting -->
        <TextView
            android:layout_width="wrap_content"
            android:layout_height="wrap_content"
            android:text="@{@string/member_since(user.joinYear)}" />
        <!-- strings.xml: <string name="member_since">Member since %d</string> -->

        <!-- Click handling -->
        <Button
            android:layout_width="wrap_content"
            android:layout_height="wrap_content"
            android:text="Edit Profile"
            android:onClick="@{() -> viewModel.editProfile()}" />

        <!-- Two-way binding — EditText syncs with ViewModel -->
        <EditText
            android:layout_width="match_parent"
            android:layout_height="wrap_content"
            android:text="@={viewModel.searchQuery}" />
        <!-- @={} = two-way: changes in EditText update ViewModel,
             changes in ViewModel update EditText -->

        <!-- Null-safe access -->
        <TextView
            android:layout_width="wrap_content"
            android:layout_height="wrap_content"
            android:text="@{user.address.city ?? `No city`}" />

    </ConstraintLayout>
</layout>
Usage in Activity
class ProfileActivity : AppCompatActivity() {

    private lateinit var binding: ActivityProfileBinding
    private val viewModel: ProfileViewModel by viewModels()

    override fun onCreate(savedInstanceState: Bundle?) {
        super.onCreate(savedInstanceState)

        binding = DataBindingUtil.setContentView(this, R.layout.activity_profile)

        // Set the lifecycle owner — required for LiveData to update the binding
        binding.lifecycleOwner = this

        // Set variables declared in <data> block
        binding.viewModel = viewModel
        binding.user = viewModel.currentUser

        // You can ALSO access Views directly (like ViewBinding)
        binding.nameText.setTypeface(Typeface.DEFAULT_BOLD)
    }
}
BindingAdapters — custom XML attributes
// BindingAdapters let you create custom XML attributes that DataBinding understands

// Load images from URL
@BindingAdapter("imageUrl")
fun ImageView.loadImage(url: String?) {
    if (url != null) {
        this.load(url) {
            placeholder(R.drawable.placeholder)
            crossfade(true)
        }
    }
}

// Usage in XML:
// <ImageView app:imageUrl="@{article.imageUrl}" />

// Show/hide based on boolean
@BindingAdapter("isVisible")
fun View.setIsVisible(visible: Boolean) {
    this.isVisible = visible
}

// Usage in XML:
// <ProgressBar app:isVisible="@{viewModel.isLoading}" />

// Formatted date
@BindingAdapter("dateText")
fun TextView.setFormattedDate(timestamp: Long) {
    this.text = SimpleDateFormat("MMM dd, yyyy", Locale.getDefault())
        .format(Date(timestamp))
}

// Usage in XML:
// <TextView app:dateText="@{article.publishedAt}" />
ViewBinding vs DataBinding — Comparison
// ┌─────────────────────────┬──────────────────────┬───────────────────────┐
// │ Feature                 │ ViewBinding          │ DataBinding           │
// ├─────────────────────────┼──────────────────────┼───────────────────────┤
// │ Type-safe View access   │ ✅ Yes                │ ✅ Yes                 │
// │ Null-safe View access   │ ✅ Yes                │ ✅ Yes                 │
// │ Bind data in XML        │ ❌ No                 │ ✅ Yes (@{})           │
// │ Two-way binding         │ ❌ No                 │ ✅ Yes (@={})          │
// │ Click handling in XML   │ ❌ No                 │ ✅ Yes (onClick)       │
// │ Custom BindingAdapters  │ ❌ No                 │ ✅ Yes                 │
// │ Expressions in XML      │ ❌ No                 │ ✅ Yes (ternary, null) │
// │ Requires <layout> tag  │ ❌ No                 │ ✅ Yes                 │
// │ Build speed             │ ✅ Fast               │ ⚠️ Slower             │
// │ Annotation processing   │ ❌ Not needed         │ ✅ Required            │
// │ APK size impact         │ ✅ Minimal            │ ⚠️ Slightly larger    │
// │ Learning curve          │ ✅ Simple             │ ⚠️ Steeper            │
// │ Error messages          │ ✅ Clear              │ ⚠️ Cryptic sometimes  │
// │ Debugging               │ ✅ Easy               │ ⚠️ XML errors harder  │
// │ Google recommendation   │ ✅ Recommended        │ ✅ Supported           │
// └─────────────────────────┴──────────────────────┴───────────────────────┘
When to Use Which
// USE VIEWBINDING when:
// - You just need type-safe View access (most apps)
// - You prefer setting data in Kotlin code (cleaner, testable)
// - You want fast build times
// - You're using Jetpack Compose alongside XML (migration path)
// - You're starting a new project

// USE DATABINDING when:
// - You have complex forms with two-way binding (EditText ↔ ViewModel)
// - You want to reduce boilerplate for simple data display (text, visibility)
// - You need BindingAdapters for reusable custom XML attributes (imageUrl, etc.)
// - Your team is already using it and it works well
// - You have layouts that are primarily data display with minimal logic

// USE NEITHER (use Jetpack Compose) when:
// - Starting a brand new project in 2024+
// - Building new features in an existing app
// - You want declarative, reactive UI without XML
The same screen — ViewBinding vs DataBinding
// VIEWBINDING approach — data binding in Kotlin code
class ProfileFragment : Fragment(R.layout.fragment_profile) {

    private var _binding: FragmentProfileBinding? = null
    private val binding get() = _binding!!
    private val viewModel: ProfileViewModel by viewModels()

    override fun onViewCreated(view: View, savedInstanceState: Bundle?) {
        super.onViewCreated(view, savedInstanceState)
        _binding = FragmentProfileBinding.bind(view)

        viewLifecycleOwner.lifecycleScope.launch {
            viewLifecycleOwner.repeatOnLifecycle(Lifecycle.State.STARTED) {
                viewModel.uiState.collect { state ->
                    binding.nameText.text = state.name
                    binding.emailText.text = state.email
                    binding.premiumBadge.isVisible = state.isPremium
                    binding.avatarImage.load(state.avatarUrl)
                    binding.loadingSpinner.isVisible = state.isLoading
                }
            }
        }

        binding.editButton.setOnClickListener { viewModel.editProfile() }
    }

    override fun onDestroyView() {
        super.onDestroyView()
        _binding = null
    }
}
// DATABINDING approach — data binding in XML
// fragment_profile.xml
<layout>
<data>
<variable name="state" type="com.example.ProfileUiState" />
<variable name="viewModel" type="com.example.ProfileViewModel" />
</data>
<ConstraintLayout ...>
<TextView android:text="@{state.name}" />
<TextView android:text="@{state.email}" />
<TextView android:visibility="@{state.isPremium ? View.VISIBLE : View.GONE}" />
<ImageView app:imageUrl="@{state.avatarUrl}" />
<ProgressBar app:isVisible="@{state.isLoading}" />
<Button android:onClick="@{() -> viewModel.editProfile()}" />
</ConstraintLayout>
</layout>
// ProfileFragment.kt — much less code
class ProfileFragment : Fragment(R.layout.fragment_profile) {
private val viewModel: ProfileViewModel by viewModels()
override fun onViewCreated(view: View, savedInstanceState: Bundle?) {
super.onViewCreated(view, savedInstanceState)
val binding = FragmentProfileBinding.bind(view)
binding.lifecycleOwner = viewLifecycleOwner
binding.viewModel = viewModel
viewLifecycleOwner.lifecycleScope.launch {
viewLifecycleOwner.repeatOnLifecycle(Lifecycle.State.STARTED) {
viewModel.uiState.collect { state ->
binding.state = state
}
}
}
}
}
// DataBinding has LESS Kotlin code but MORE XML complexity
// ViewBinding has MORE Kotlin code but SIMPLER XML
// The total complexity is similar — it's just distributed differentlyUsing Both Together
// You CAN enable both in the same project
android {
    buildFeatures {
        viewBinding = true
        dataBinding = true
    }
}

// DataBinding automatically enables ViewBinding functionality
// Layouts with <layout> tag → DataBinding (expressions + View access)
// Layouts without <layout> tag → ViewBinding (View access only)

// This lets you:
// - Use DataBinding for complex forms (two-way binding)
// - Use ViewBinding for simple screens (just View access)
// - Gradually migrate from one to the other
Include Layouts
<!-- ViewBinding with include -->
<!-- main_layout.xml -->
<LinearLayout>
    <include
        android:id="@+id/toolbar"
        layout="@layout/layout_toolbar" />
    <include
        android:id="@+id/content"
        layout="@layout/layout_content" />
</LinearLayout>
// Access included layout Views through the include ID
binding.toolbar.titleText.text = "Articles"
binding.content.recyclerView.adapter = adapter
// The include MUST have an android:id for ViewBinding to generate a reference
// Without ID, you can't access the included layout's Views through the binding<!-- DataBinding with include — pass variables -->
<layout>
<data>
<variable name="user" type="com.example.User" />
</data>
<LinearLayout>
<include
android:id="@+id/header"
layout="@layout/layout_header"
app:user="@{user}" />
<!-- Passes the user variable to the included layout -->
</LinearLayout>
</layout>Migration Path: findViewById → ViewBinding → Compose
// Stage 1: Replace findViewById with ViewBinding
// - Enable viewBinding in build.gradle
// - Replace all findViewById calls with binding.viewId
// - Add nullable binding pattern in Fragments
// ✅ Immediate benefit: no more null/type crashes

// Stage 2: (Optional) Add DataBinding where it adds value
// - Wrap forms with <layout> for two-way binding
// - Create BindingAdapters for common patterns (imageUrl, visibility)
// ✅ Benefit: less boilerplate for data-heavy screens

// Stage 3: Migrate to Jetpack Compose
// - New features → write in Compose
// - Use ComposeView inside XML layouts for gradual migration
// - Eventually replace entire screens with Compose
// ✅ Benefit: declarative UI, no XML, no binding boilerplate at all

// The recommended path for most teams:
// findViewById → ViewBinding → Compose (skip DataBinding)
// DataBinding adds complexity that Compose eliminates entirely
Common Mistakes to Avoid
Mistake 1: Not nulling binding in Fragment onDestroyView
// ❌ Memory leak — binding holds View references after View is destroyed
class MyFragment : Fragment(R.layout.fragment_my) {
    private lateinit var binding: FragmentMyBinding   // never nulled!

    override fun onViewCreated(view: View, savedInstanceState: Bundle?) {
        binding = FragmentMyBinding.bind(view)
    }
    // Fragment goes to back stack → View destroyed → binding still holds Views → LEAK
}

// ✅ Use nullable pattern
class MyFragment : Fragment(R.layout.fragment_my) {
    private var _binding: FragmentMyBinding? = null
    private val binding get() = _binding!!

    override fun onViewCreated(view: View, savedInstanceState: Bundle?) {
        _binding = FragmentMyBinding.bind(view)
    }

    override fun onDestroyView() {
        super.onDestroyView()
        _binding = null   // Views can be garbage collected
    }
}
Mistake 2: Using DataBinding for simple View access
// ❌ Overkill — using DataBinding just to avoid findViewById
<layout>
    <data></data>   <!-- empty data block! -->
    <LinearLayout>
        <TextView android:id="@+id/title" />
    </LinearLayout>
</layout>

// ✅ Use ViewBinding — no <layout> tag needed, faster builds
<LinearLayout>
    <TextView android:id="@+id/title" />
</LinearLayout>
Mistake 3: Complex logic in DataBinding expressions
<!-- ❌ Business logic in XML — hard to test, debug, and maintain -->
<TextView android:text="@{user.age > 18 ? (user.isPremium ? `Premium Adult` : `Free Adult`) : `Minor`}" />

<!-- ✅ Keep logic in ViewModel — XML just displays the result -->
<TextView android:text="@{viewModel.userLabel}" />

// In ViewModel:
val userLabel: String get() = when {
    user.age <= 18 -> "Minor"
    user.isPremium -> "Premium Adult"
    else -> "Free Adult"
}
Mistake 4: Forgetting lifecycleOwner in DataBinding
// ❌ LiveData/StateFlow won't update the binding without lifecycleOwner
val binding = ActivityProfileBinding.inflate(layoutInflater)
binding.viewModel = viewModel
// LiveData changes → UI doesn't update!

// ✅ Always set lifecycleOwner
binding.lifecycleOwner = this   // Activity
// or
binding.lifecycleOwner = viewLifecycleOwner   // Fragment
Mistake 5: Missing android:id on include layouts
<!-- ❌ No ID — ViewBinding can't generate a reference -->
<include layout="@layout/layout_toolbar" />
// binding.??? — no way to access the toolbar Views!

<!-- ✅ Always add an ID to includes -->
<include android:id="@+id/toolbar" layout="@layout/layout_toolbar" />
// binding.toolbar.titleText — works!
Summary
- Both ViewBinding and DataBinding replace
findViewByIdwith type-safe, null-safe View access - ViewBinding: lightweight, fast builds, no XML changes, just generates binding classes — recommended for most projects
- DataBinding: powerful, binds data in XML with
@{}, supports two-way binding, BindingAdapters, and expressions — use for complex forms or data-heavy screens - ViewBinding has faster build times (no annotation processing) and simpler error messages
- DataBinding requires
<layout>wrapper andlifecycleOwnerfor LiveData/StateFlow updates - Keep logic out of DataBinding XML — use ViewModel for computed properties, XML just displays them
- In Fragments, always use the nullable binding pattern and null out
_bindinginonDestroyView - Add
android:idto<include>layouts for ViewBinding to generate references - You can use both in the same project — DataBinding for complex screens, ViewBinding for simple ones
- The recommended migration path: findViewById → ViewBinding → Compose (skip DataBinding unless you need it)
- Jetpack Compose eliminates the need for both — it’s the future of Android UI
For most teams in 2024+, ViewBinding is the right choice for XML layouts — it’s simple, fast, and doesn’t add complexity. DataBinding still has its place for form-heavy screens and BindingAdapters, but Jetpack Compose is increasingly the better answer for reactive UI. Choose ViewBinding for existing XML, Compose for new features, and you’ll have a clean, maintainable codebase.
Happy coding!
Comments (0)